

- A Global Admin or Workspace Admin role. Only they can manage senders. Senders belong to a workspace, so every funnel in that workspace can use them.
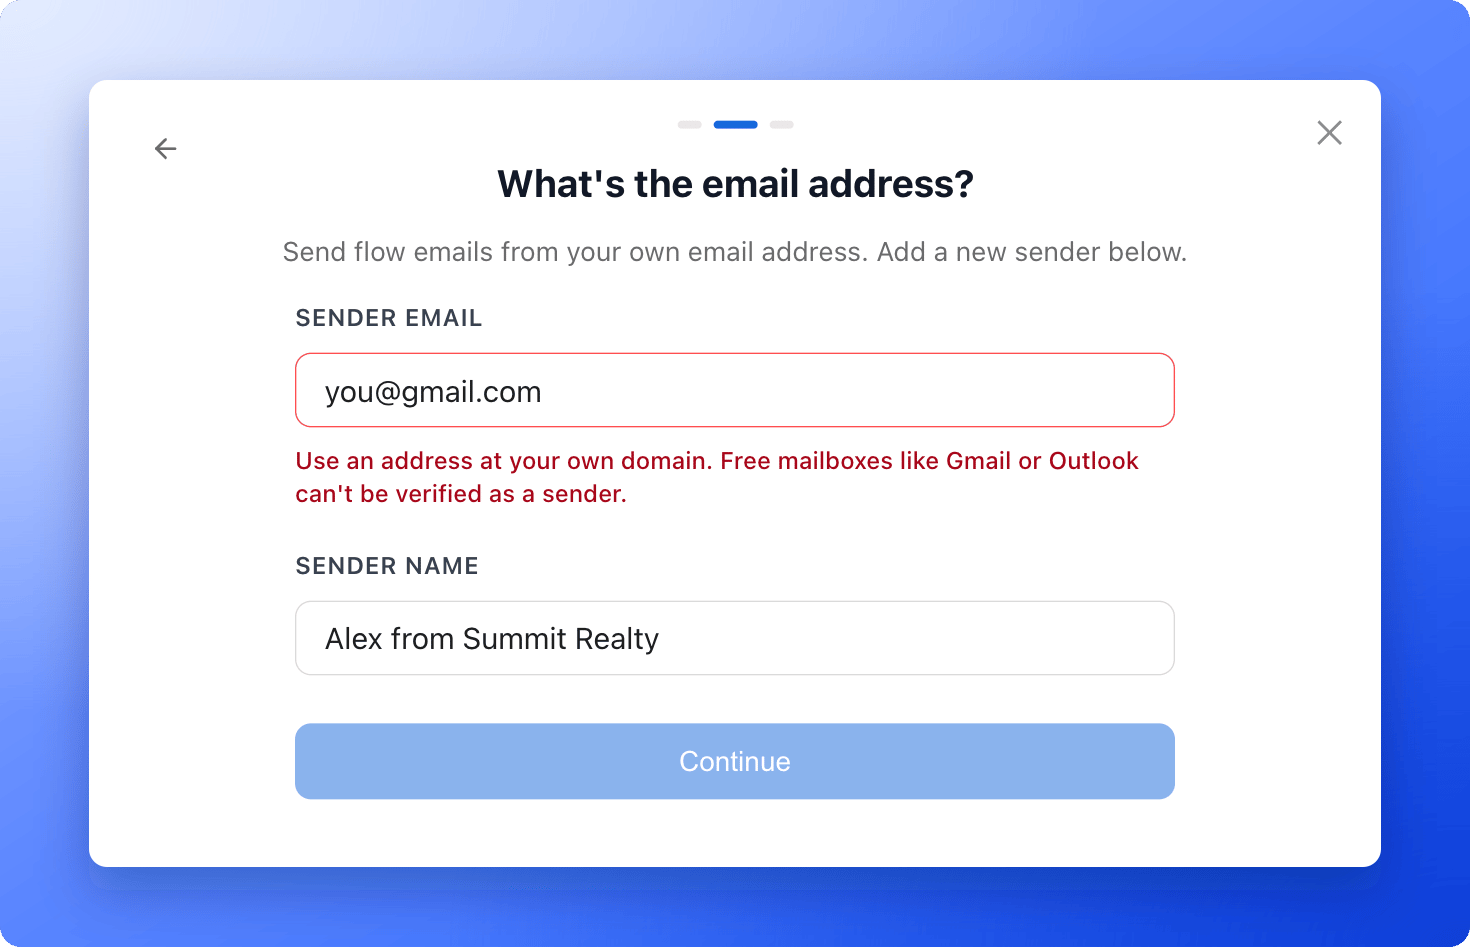
- An email address on your own domain, such as you@yourcompany.com. Free addresses from Gmail, Outlook or Yahoo cannot be verified.
- Access to the DNS settings where your domain is managed, such as Namecheap, GoDaddy or Cloudflare. DNS records are settings that prove you own the domain.
Add a sender
1
Open the Senders tab
- Go to your Workspaces page, click the three dots on the workspace’s row and choose “Workspace settings”. See What is a workspace?.
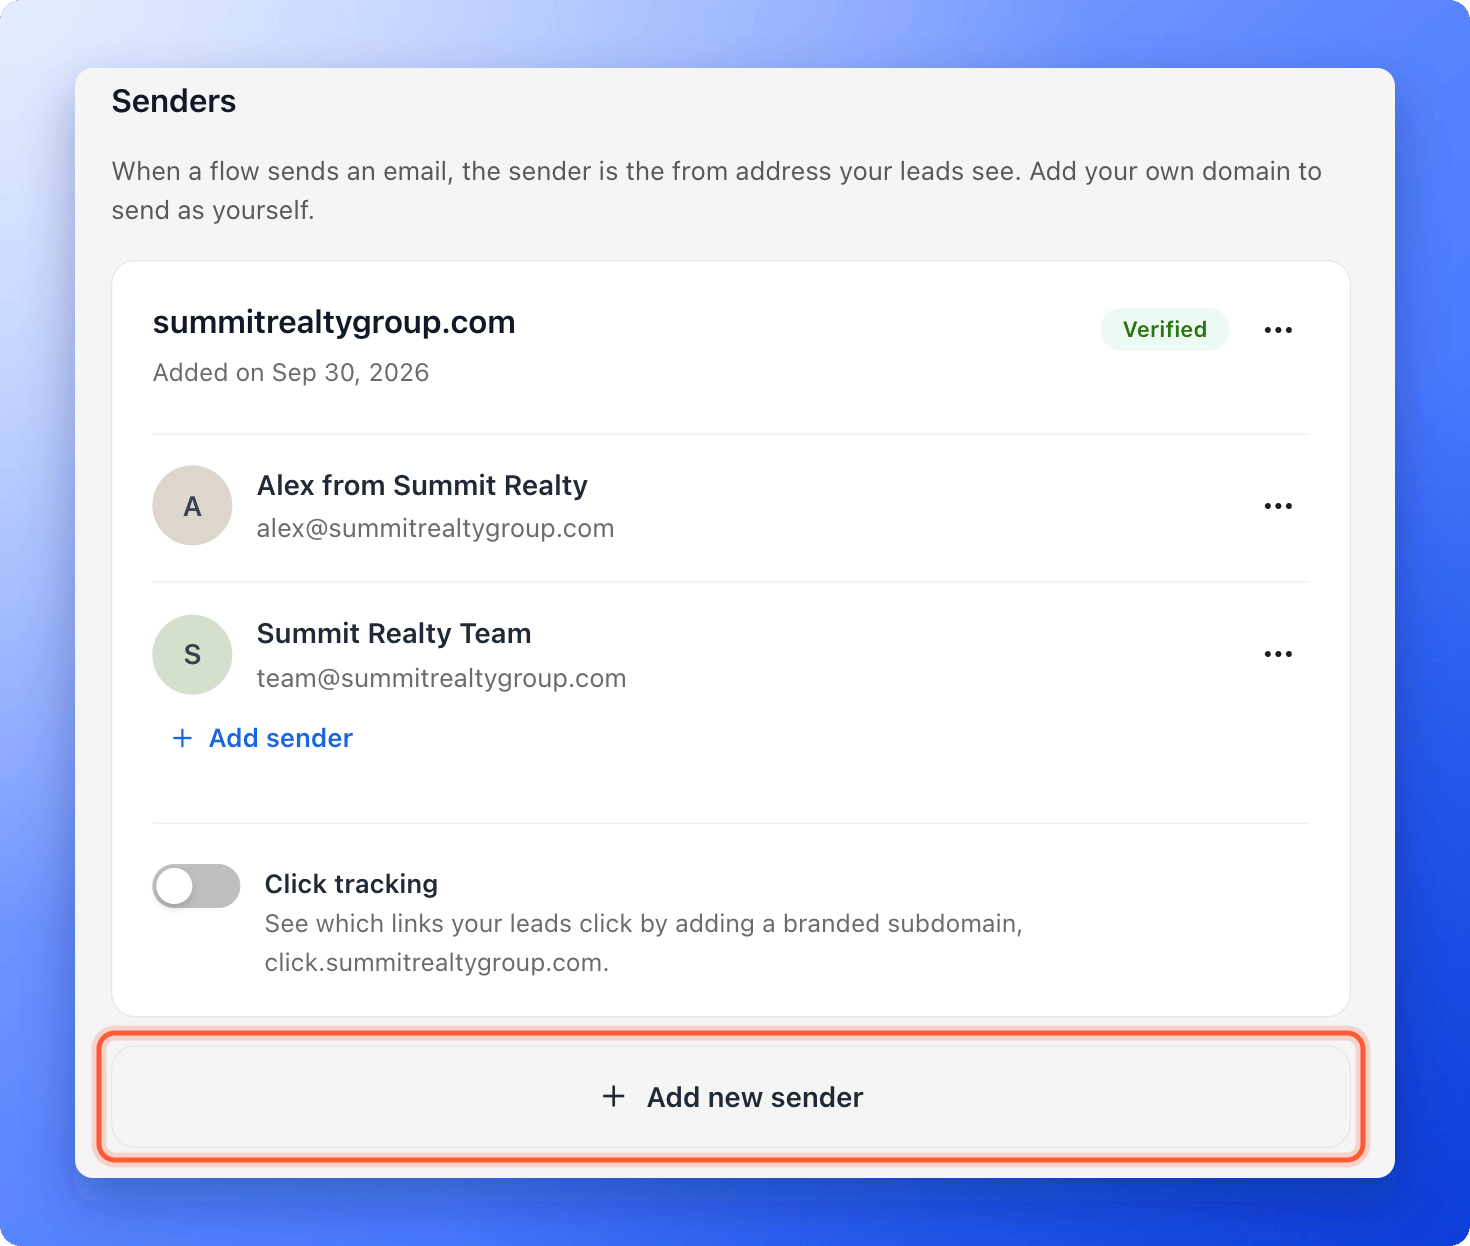
- Click “Senders” in the left menu.
2
Enter the address and name
- Click “Add new sender”, then “Continue” on the first screen.
- Under Sender email, type an address on your own domain, for example you@yourcompany.com.
- Under Sender name, type the name leads see in their inbox, for example “Jane from Acme”.
- Click “Continue”.
3
Verify your domain
If the domain is new to your workspace, the Verify your domain window lists DNS records with a Type, a Host and a Value.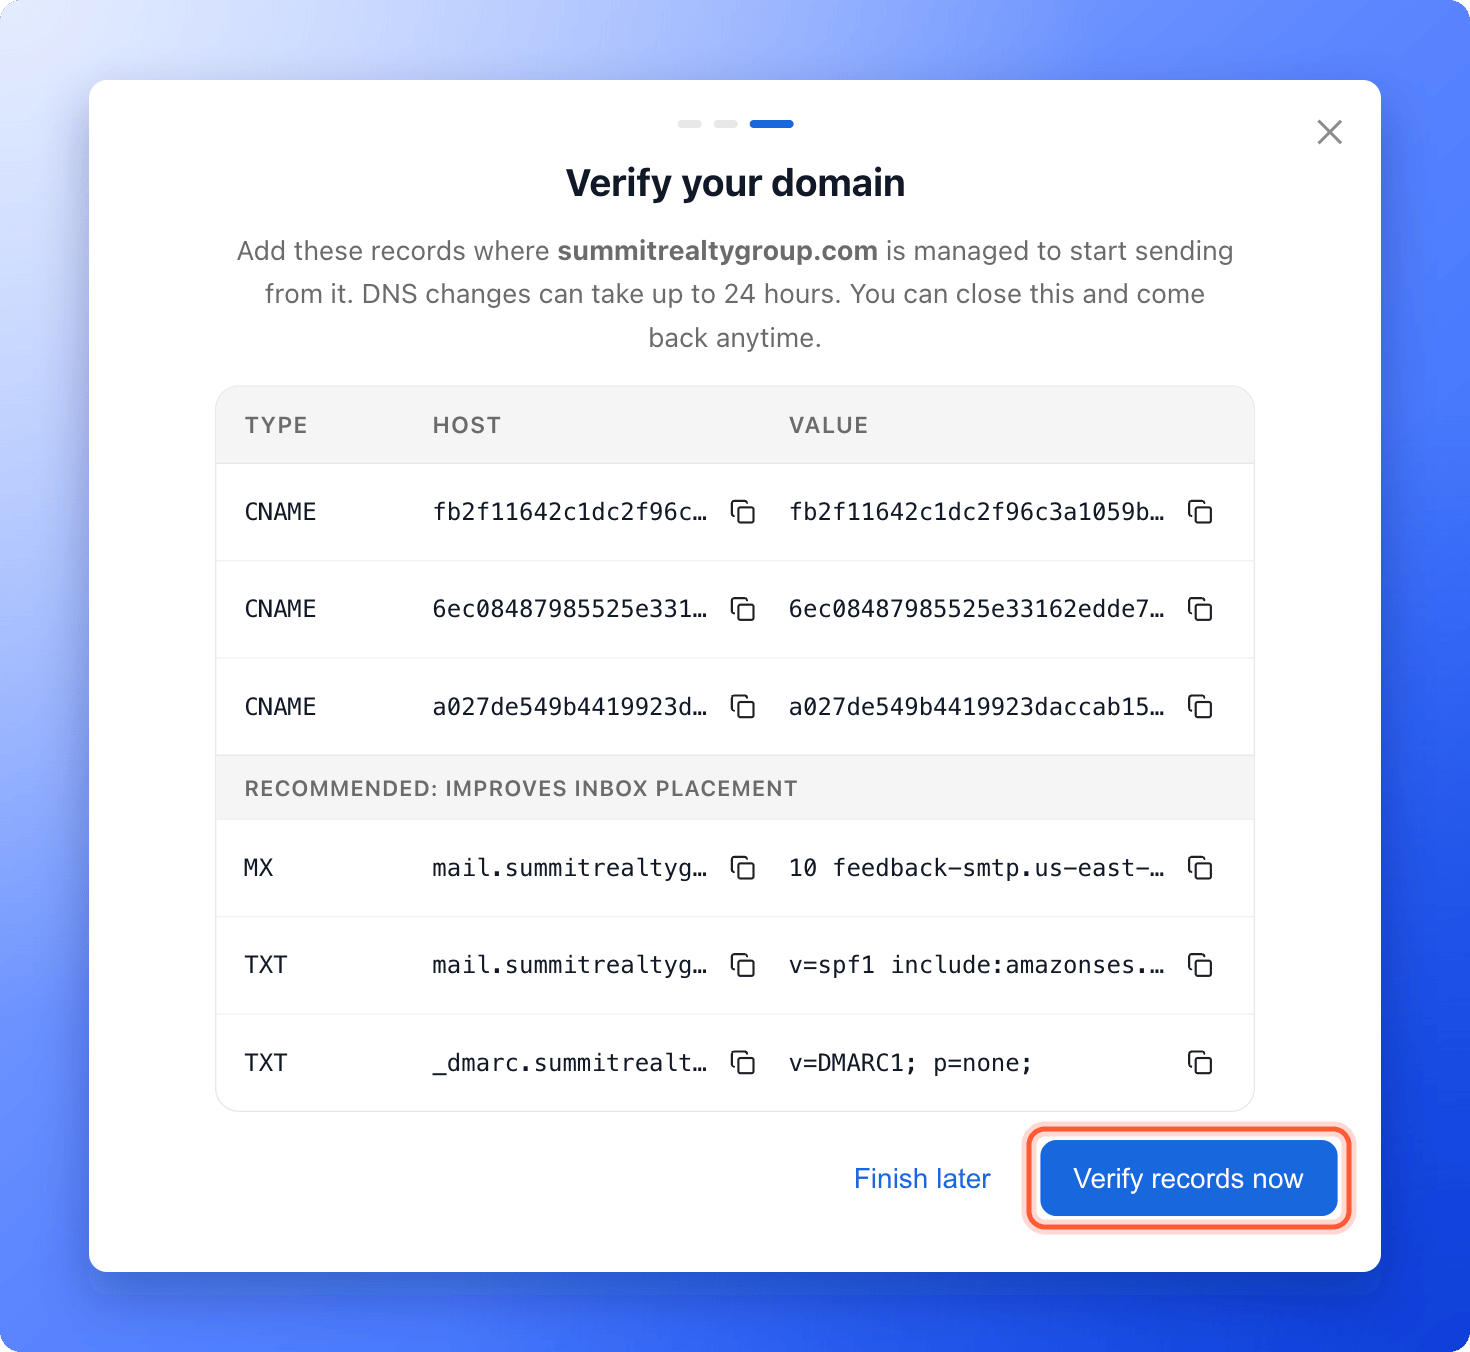
- Log in to the place where your domain is managed.
- Add each record exactly as shown. Use the copy icons next to the Host and Value.
- The records under Recommended: improves inbox placement are optional, but they help your emails reach the inbox.
- Back in AskFunnel, click “Verify records now”.
Add another sender on a verified domain
Once a domain is Verified, click “Add sender” on its card. Type only the part before the @, add a Sender name and click “Continue”. The sender is ready right away, with no new DNS records.Turn on click and open tracking
To see which links your leads click, use the Click tracking switch on the domain’s card. AskFunnel shows one more record to add at your DNS provider, for a branded address such as click.yourcompany.com. Add it, then click “Verify record”. When it says “Click tracking is active.”, the switch stays on. After that, an Open tracking switch appears. It uses an invisible image to detect opens. This can slightly affect deliverability (whether your emails reach the inbox), and Apple Mail inflates open counts, so turn it on only if you need it. Tracking results appear on each email in your flow. See Send automated emails to new leads.Manage your senders
- Rename a sender: click the three dots next to it, choose “Rename sender”, change the name and click “Save”.
- Delete a sender: click the three dots, choose “Delete” and confirm. Any flow that used it cannot send until you choose another sender.
- Turn off tracking: click the three dots on the domain, choose “Turn off tracking” and confirm.
- Remove a domain: click the three dots on the domain and choose “Remove domain”. Its senders are deleted, and flows cannot send from it until you add and verify it again.
Troubleshooting
My sender does not appear in the From list
My sender does not appear in the From list
Only senders on a Verified domain appear. Open Senders, check the domain status and finish verification.
My domain stays Pending or shows Failed
My domain stays Pending or shows Failed
Check that every record was saved exactly as shown, with the same Host and Value. Some DNS providers add your domain to the end of the host automatically, so you may need to type only the first part. Wait up to 24 hours, then click “Verify records now” again.
I see Only workspace admins can manage these settings
I see Only workspace admins can manage these settings
Ask a Workspace Admin or Global Admin to add the sender, or to give you the Workspace Admin role.
What to do next
Send automated emails to new leads
Build a flow that emails each new lead with your new sender.
Keep your emails out of spam
Help your emails reach the inbox.