

Available on: all plans (Starter, Growth, Scale and Enterprise). Starter flows can send one email. Flows with several emails need the Growth plan or above.
- A verified sender, which is the from address your leads see. See Add and verify a sender email.
- A funnel whose form asks for an email address. Leads without one are skipped. See Set up your lead capture form.
Important to note
Create a flow
1
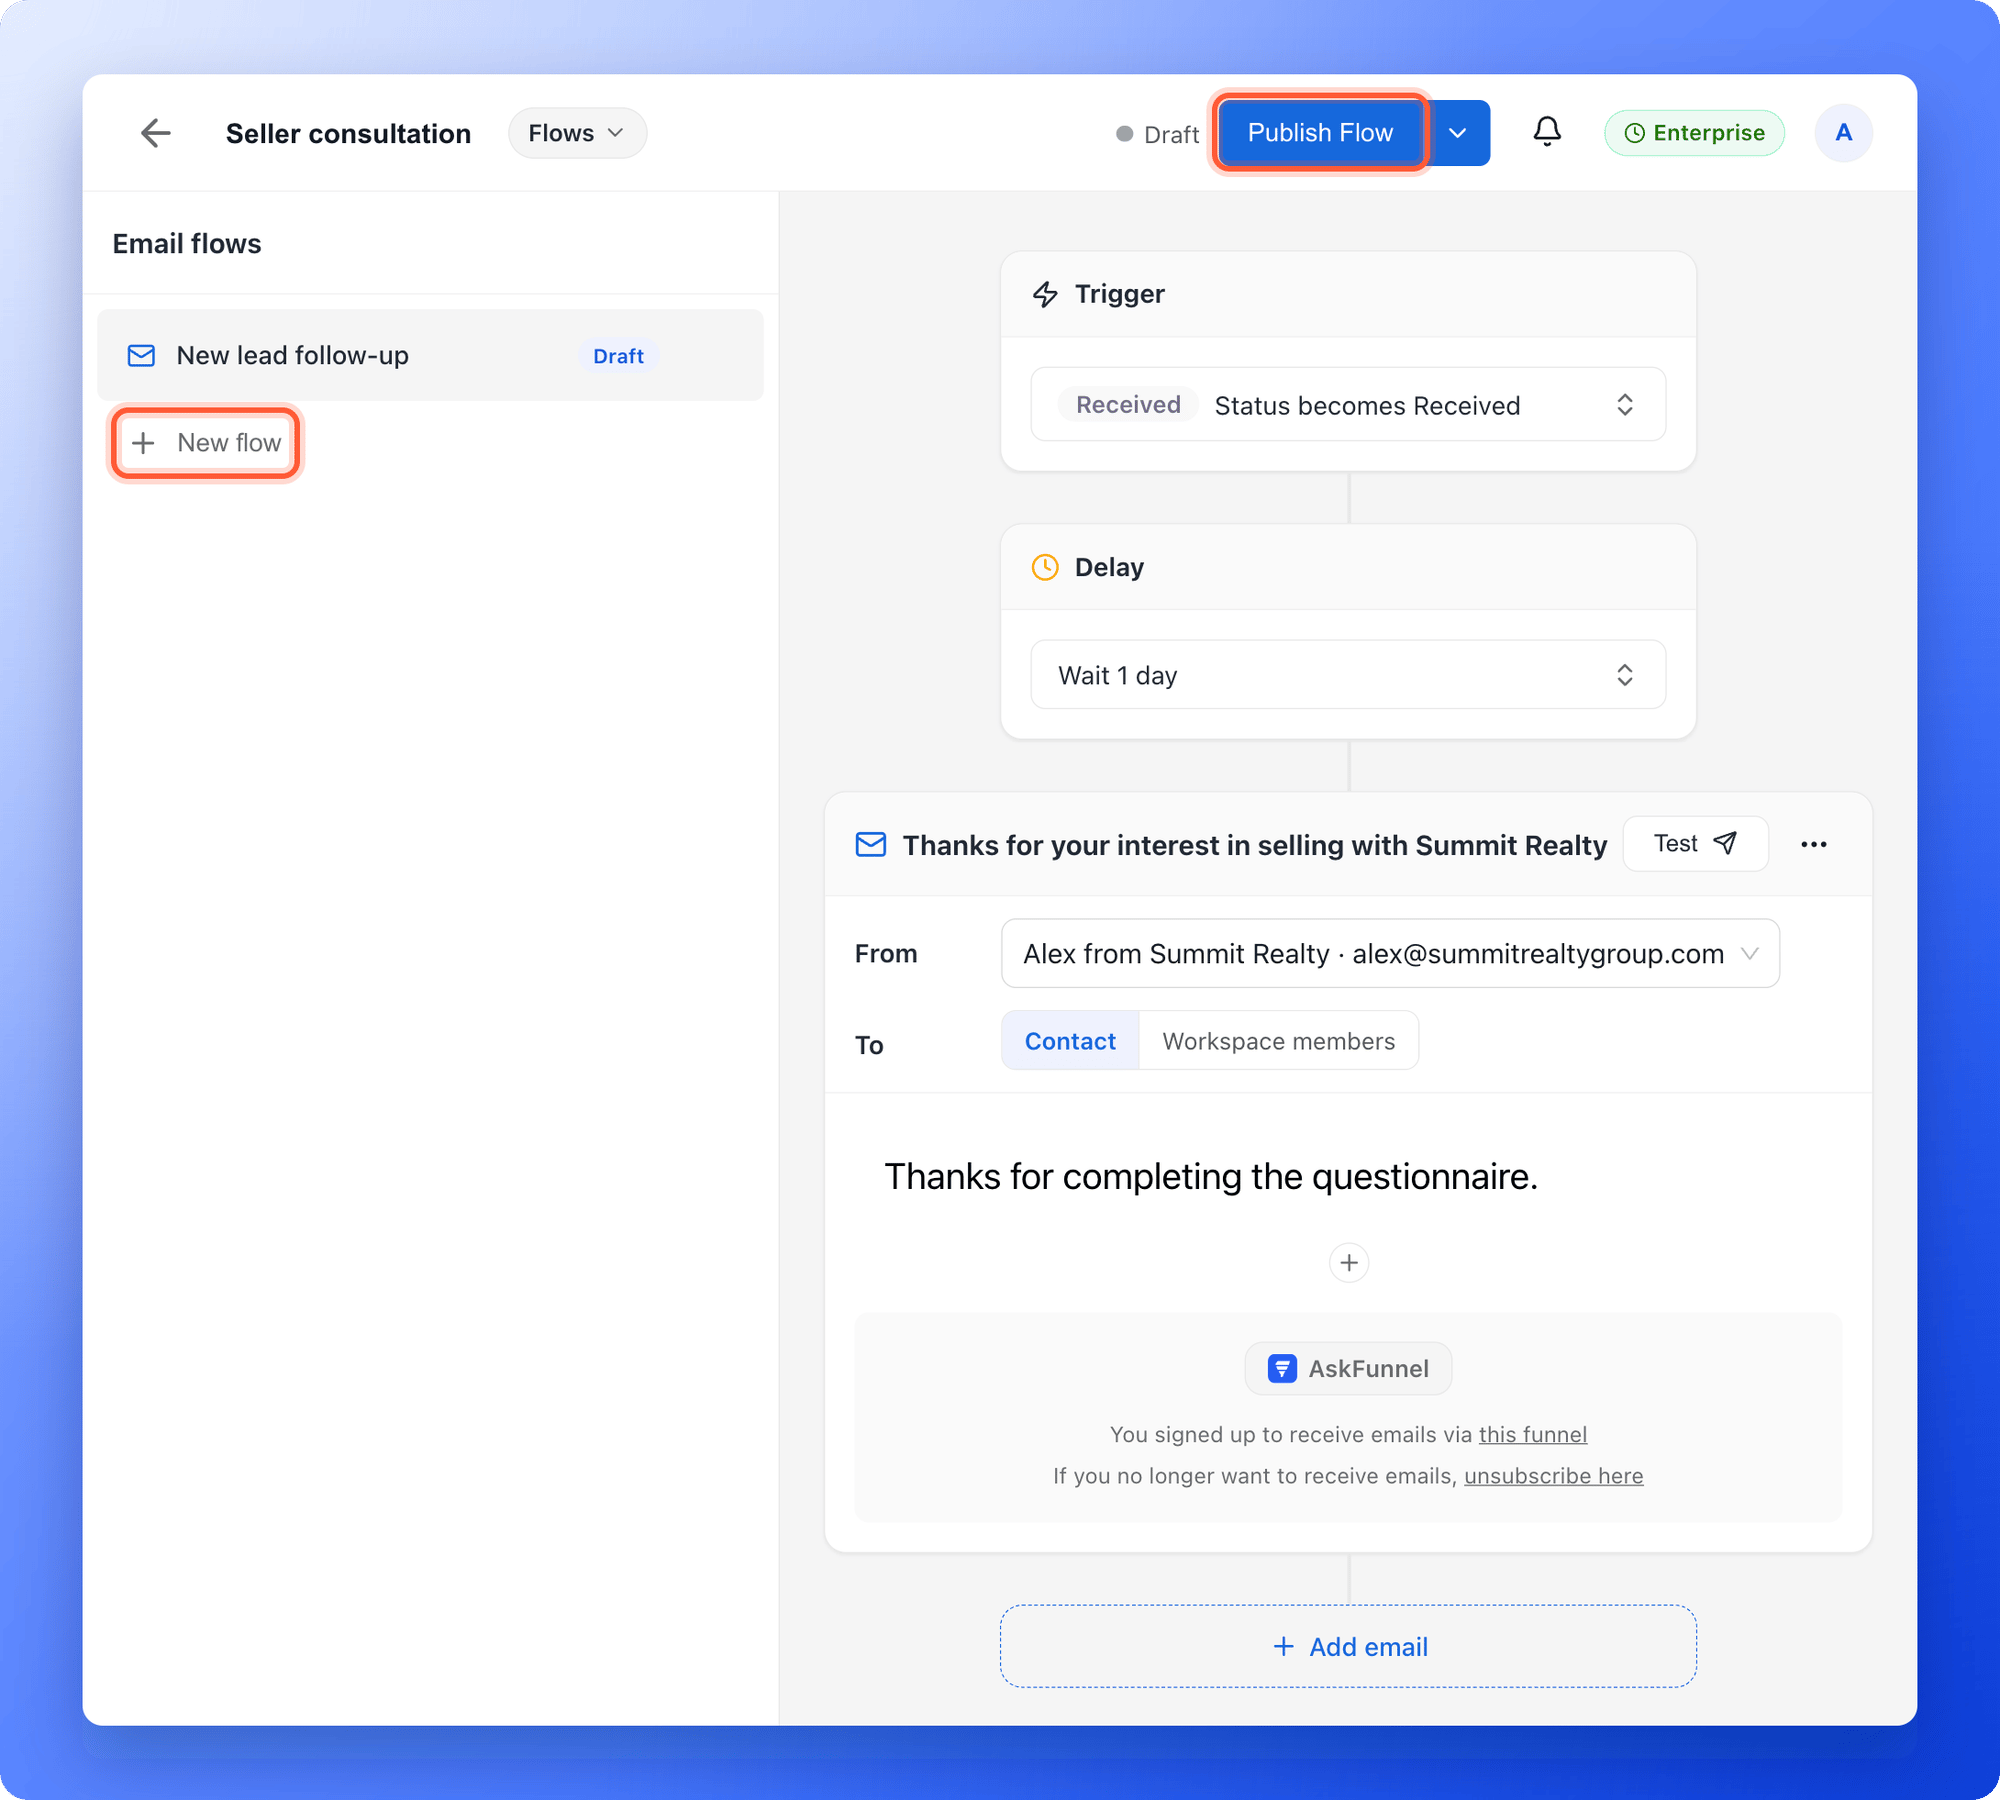
Open the Flows editor
- From your main dashboard, find the funnel.
- Click the three small dots (…) on that funnel’s row, then click “Edit Funnel”.
- At the top, next to the funnel name, click the Funnel button and choose “Flows”.
- Click “New flow” on the left. To rename it, click the three dots next to the flow and choose “Rename”.
2
Choose when it starts
The trigger is the status that starts the flow.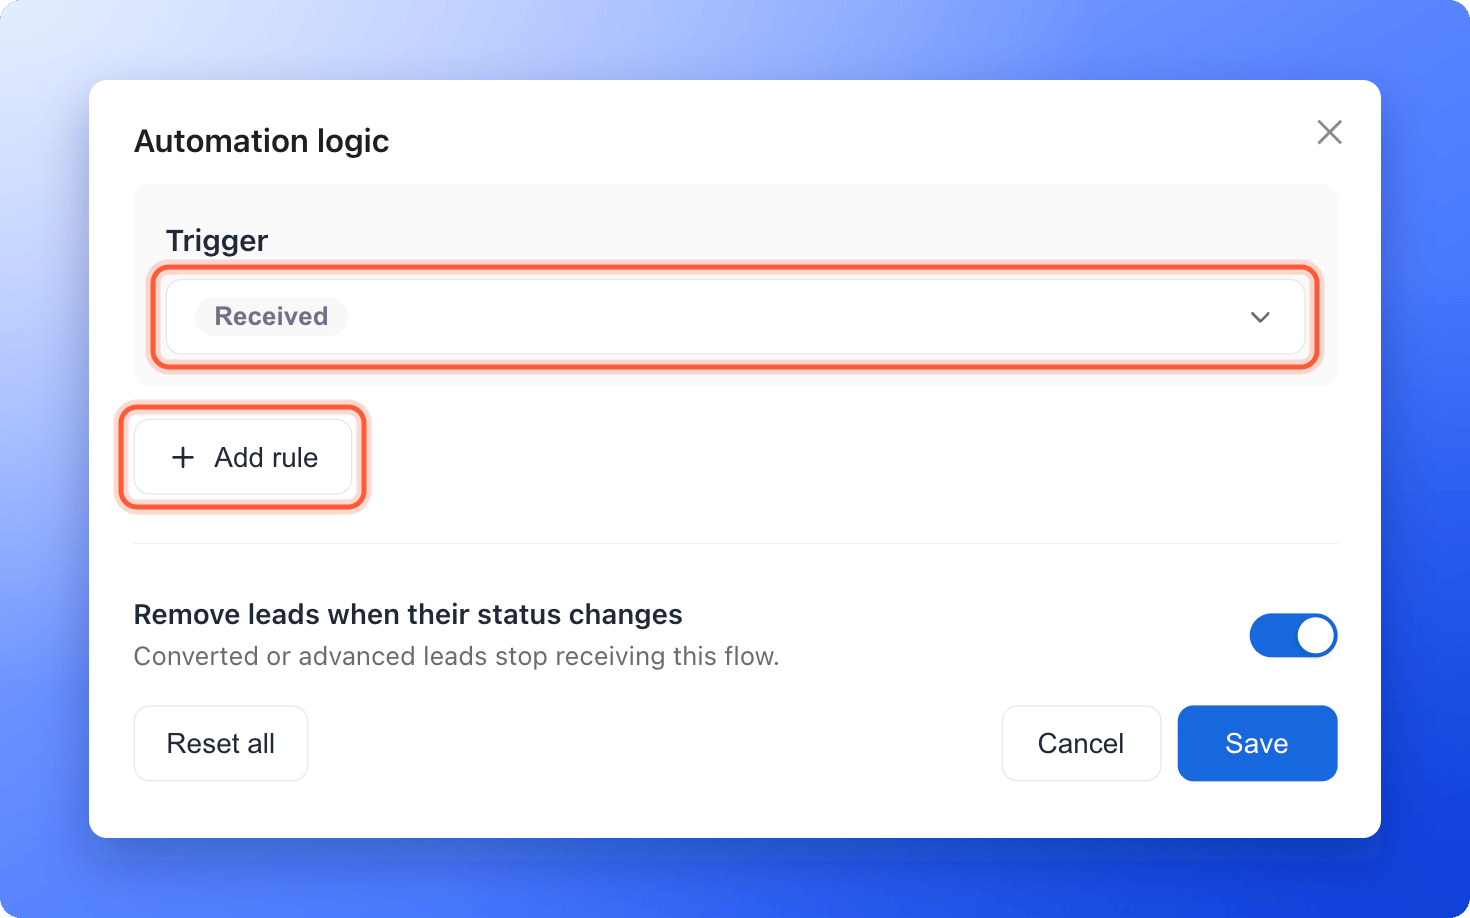
- Click the Trigger card. The Automation logic window opens.
- Under Trigger, pick the status that starts the flow. RECEIVED means every new lead.
- Optional: click “Add rule” to send only to some leads. Pick a field from Contact fields or Funnel answers, choose how to compare, for example Is exactly, and pick the answer. Add more rules and join them with And or Or.
- Click “Save”.
3
Write the email
- Next to From, choose your verified sender.
- Leave To on Contact, which is the lead’s email address.
- Click Add a subject and type your subject line.
- Write your message in the text block. Type @ to insert a detail from the lead, such as their name. Pick the field, then type a fallback that is used when the field is empty, for example “there”, or click “No fallback”.
- To add more, click the + below the message and pick a block: Text, Image, Button, Divider, Graphics, List, Spacer or File.
4
Add a file or link (optional)
To send a guide, price list or discount, click the + below your text and choose File.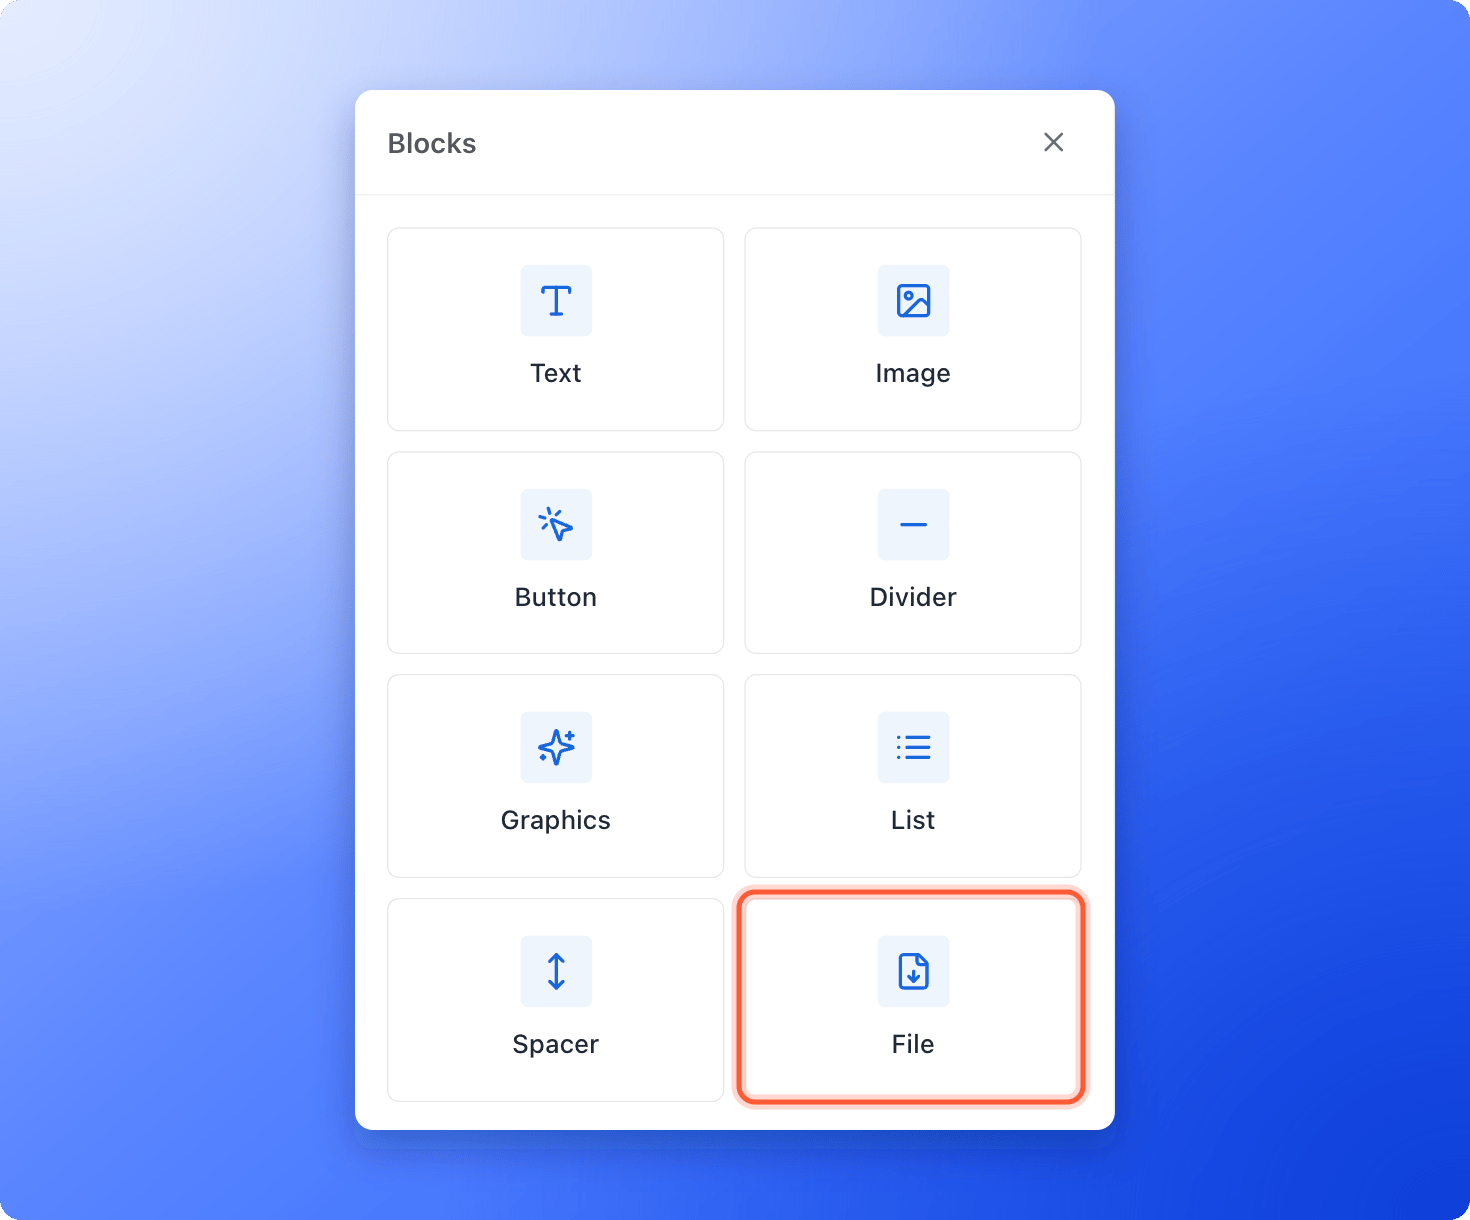
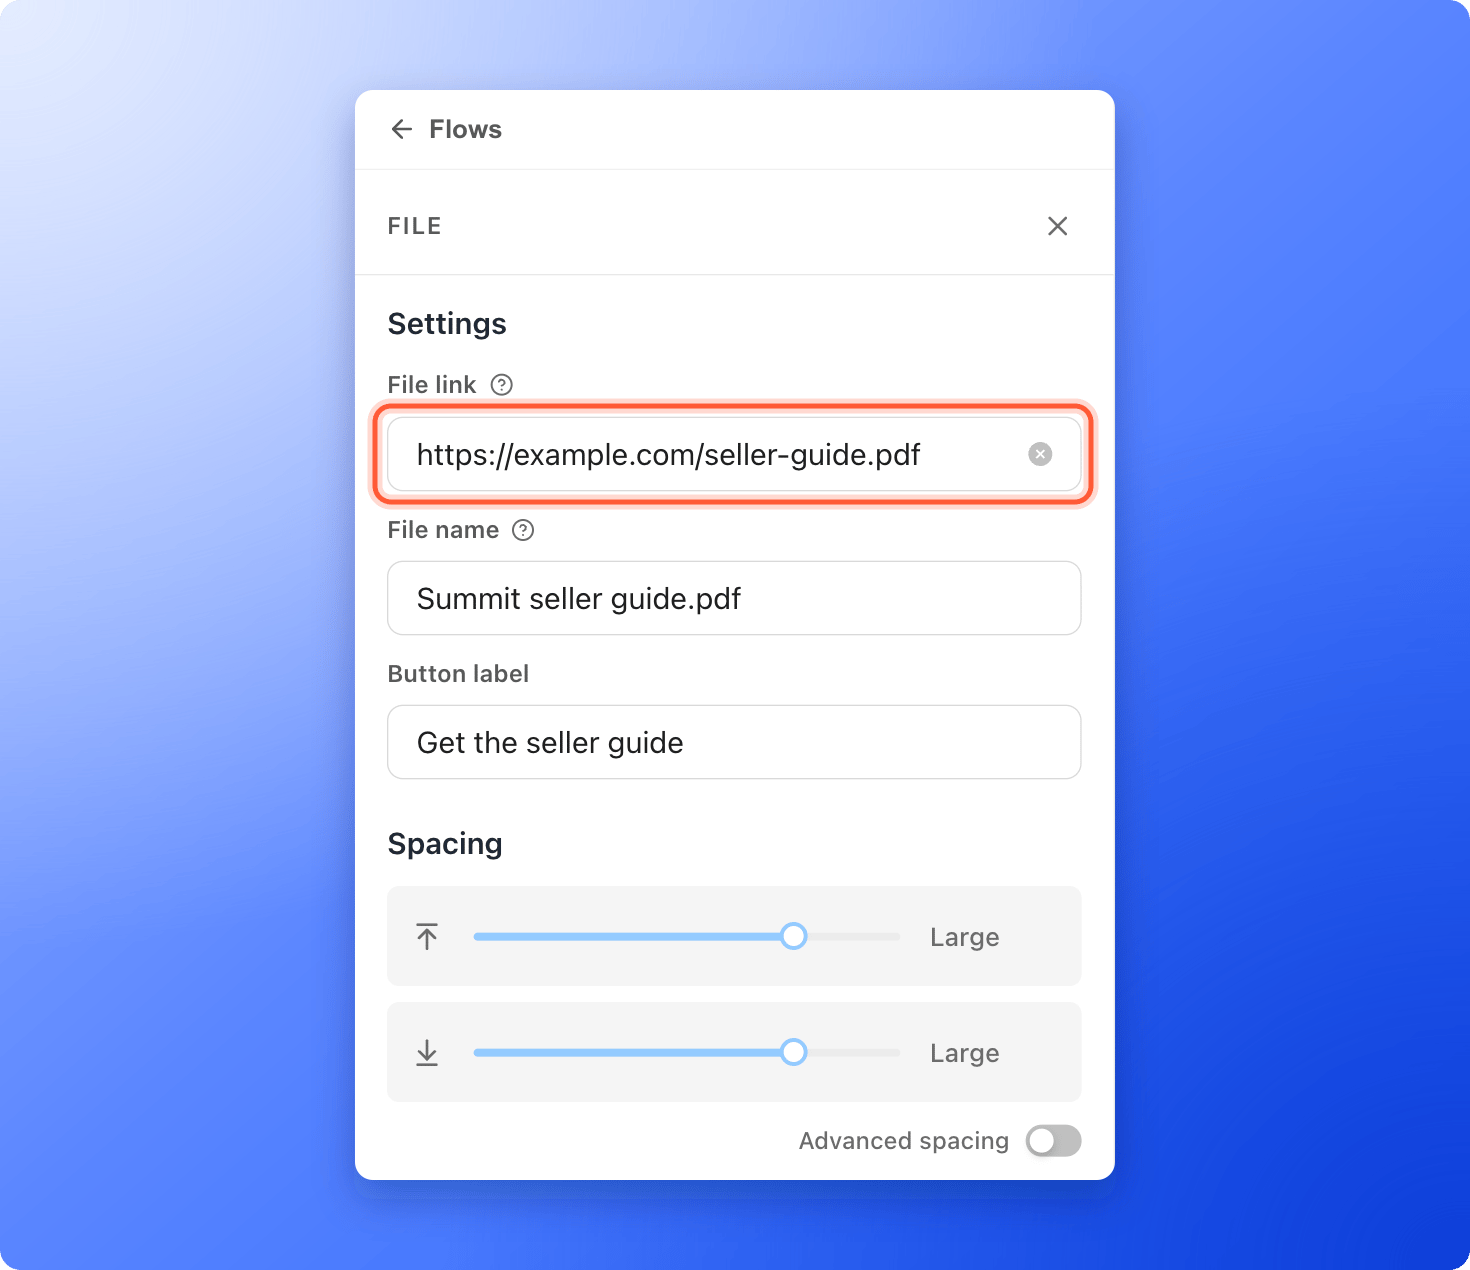
- Under File link, paste a public link to your file, such as a PDF in Google Drive.
- Under File name, type what the lead sees.
- Change Button label from Download if you like, for example to “Get the discount guide”.
5
Send yourself a test
Click “Test” at the top of the email. A copy arrives in your own inbox with [Test] in front of the subject. The button works after you choose a sender, and your organization can send up to 20 test emails per hour.
6
Publish the flow
Click “Publish Flow” at the top right. When it says “Flow published.”, the flow is Live and new leads who reach your trigger status start receiving it.
How do I know it is working?
- In the editor: the flow shows Live in the list on the left and in the top bar. After your first send, each email shows its counts for Sent, Delivered, Clicked and Bounced. Opened appears when open tracking is on.
- On a lead: open the lead and look at Email flows in the Profile tab. It shows the flow with a state (Active, Waiting, Paused, Completed, Failed or Cancelled) and lines such as Email sent, Delivered, Opened, Clicked, Bounced, Marked as spam and Waiting until.
Edit or turn off a flow
- Edit a live flow: a status of Changes available means you edited a live flow. Click “Publish Flow” again to send the changes live. Leads already in the flow finish with the version they started on.
- Turn a flow off: this stops it for everyone. Leads still waiting for their next email will not get it.
Troubleshooting
Publish Flow shows an error
Publish Flow shows an error
AskFunnel highlights each step that needs attention and says “Fix the highlighted steps before publishing.” The messages you may see are:
- Choose which lead status starts this flow. Open the Trigger card and pick a status.
- Choose a sender for this email. Pick a sender under From.
- Every email needs a subject line. Type a subject.
- Add content to this email before publishing. Add text or another block.
- Multiple messages require a higher plan. Starter flows can only send one email.
The From list says No verified sender yet
The From list says No verified sender yet
Click “Add new sender” in the list and finish verification. See Add and verify a sender email.
A lead did not get the email
A lead did not get the email
Open the lead and check Email flows in Profile. People who unsubscribe are skipped automatically, and so are addresses that bounced or marked a message as spam. Other common reasons: the lead has no email address, the lead reached the status before the flow went live, the flow is off, your monthly allowance is used up, or sending was paused to protect deliverability (whether your emails reach the inbox). See Keep your emails out of spam.
My test email shows a different name
My test email shows a different name
Test emails use sample details. The lead’s name appears as Alex Example and other @ fields show their fallback text.
What to do next
Send a series of follow-up emails
Add delays and more emails to your flow.
Email your team when a lead arrives
Get an alert the moment a lead submits.
Keep your emails out of spam
Help your emails reach the inbox.
Track leads with statuses
Choose which status starts each flow.